Friday, August 31, 2012

Is Braiding good??

Recently I was asked if braiding my daughter's hair is a good idea.  Braiding and twisting the hair is a very good protective style, that is low maintenance that only requires a touch up every other day and it can last for up two weeks.

However, braiding too tightly is not recommended as it can cause problems like hair loss, headaches and/or Traction Alopecia.

Definition of Traction Alopecia: 

Traction alopecia is a form of alopecia, or gradual hair loss, caused primarily by pulling force being applied to the hair.[1]:761[2]:645 This commonly results from the sufferer frequently wearing his/her hair in a particularly tight ponytail, pigtails, or braids. It is also seen occasionally in long-haired people who use barrettes to keep hair out of their faces.    

In order to prevent Traction Alopecia, I recommend that you do not braid your child's hair too tight.  The braids may look better if they are tight, but it is definitely NOT worth it.  Any tight tension is not good for the hairline, scalp or the hair in its entirety.  
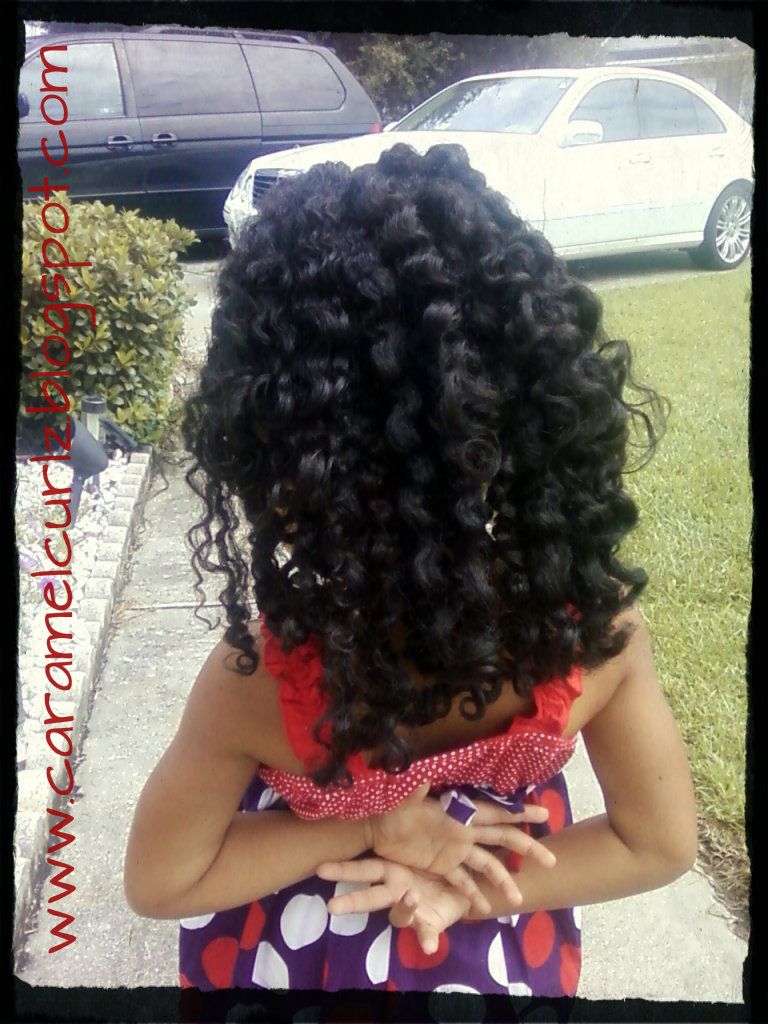
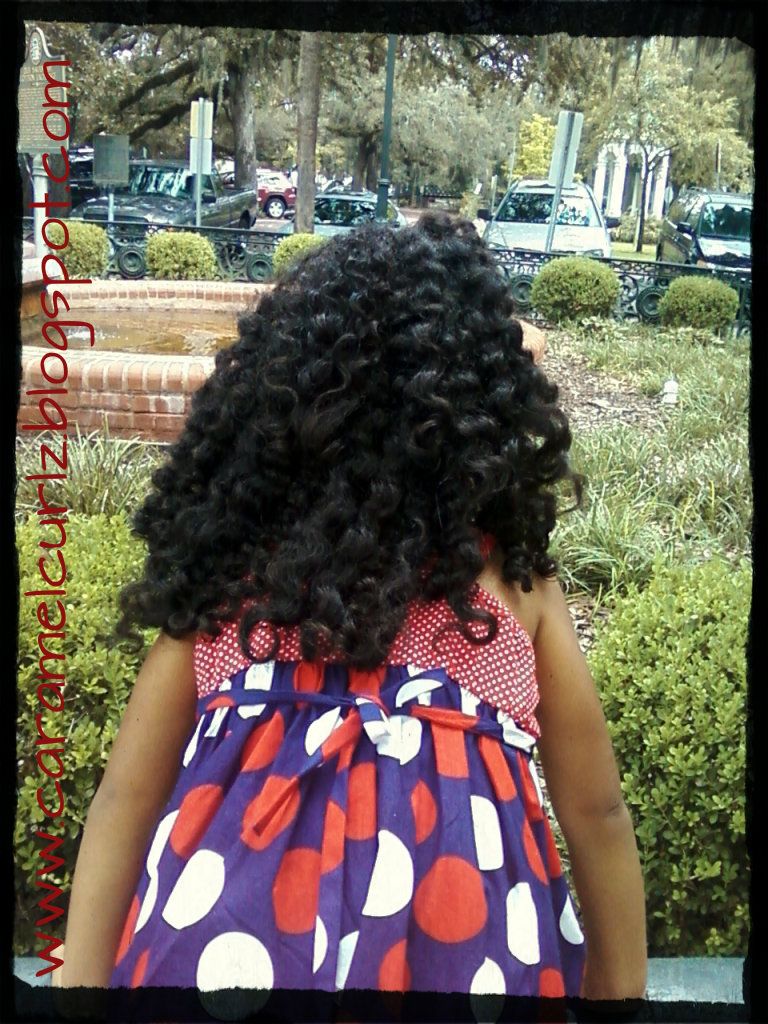
Remember that curly hair is very delicate and therefore should be handled and cared for properly.  Traction Alopecia is not something you should take lightly.  The damage this causes can be permanently.

YES, if the braids are NOT done tightly the style may NOT look as nice or may NOT last long but to be honest, I rather for the style to last two weeks and my child's hair be healthy than for the style to last a month or two and damage my child's hair.

Listen to your child:  It is very important that if you child tells you "it hurts", take their word for it and re-check that particular cornrow or braid and re-do the braid if you have to.  I know it can be very annoying at times but pain and itchiness is not normal.   If you notice little bumps on the scalp, remove the braids, massage the scalp and give the hair a break by choosing another protective style like: Two Strand Twist, Flat Twists, Bun or Box Braids that are done a bit lose from the root.

Always be kind to their tresses and keep the hairline in mind at all times. 

I honestly believe that braiding the hair does not makes it grow! I think that the hair grows by having a healthy routine, using the right moisturizing products, using protective styles to lower the chances of breaking, and of course trimming.    I also suggest minimizing the use of heat (i.e. blow dryers, hot rollers, etc.), stay away from relaxers. I instead try "banding" as a method for stretching the hair.

Keeping the hair and scalp healthy is and should always be the main focus.  Healthy hair DOES grow, it may not grow as fast as you would like, but it does grow. 

QUICK GUIDELINE TO PREVENT BREAKAGE:

Hair breakage is another common problem seen in children with curly hair, however, this is preventable.

Breakage is another cause for the hair not to grow.  Using a wide tooth comb can help prevent breakage.  At the beginning of my journey I was using a regular comb and every time I tried to detangle my daughter's hair I noticed chunks of hair were on the comb along with the tangles.  Try using a wide tooth comb, denman combs are very popular but I always use a wide tooth comb and my finger to detangle my daughter's hair. 

To keep the hair healthy I recommend you deep conditioning once a week or at least every other week.  Try using a deep conditioner (repair treatment) and/or Hot Oil Treatment. Then use a shower cap and a warm towel over the cap to crate heat instead of a blow dryer.  I deep condition my children's hair at least once a month.

DO NOT RELAX OR PERM the hair, I cannot stress how damaging this can be to the hair.

Don't over shampoo, as I have mentioned before, over shampooing will dry the hair out.  Sulfate Free Shampoo is the best you can use on their curls.

Not conditioning enough can be another reason why the hair is dry.  I use two different  of conditioners, a "rinse out" conditioner and a Leave In Conditioner.  Remember curly hair needs moisturize since curly hair is often dry by nature, so don’t be afraid to moisturize as needed.  I moisturize my daughter's hair as often as I feel she needs it.  I concentrate on moisturizing her ends, roots and scalp.  
  
"Do not over do it".  This is one of my favorite myths.  My mother was a big believer of the "100 strokes per day", but what she didn't know is that the 100 stroke rule does NOT apply to curly hair.  In fact, the less you manipulate curly hair the healthier it becomes.
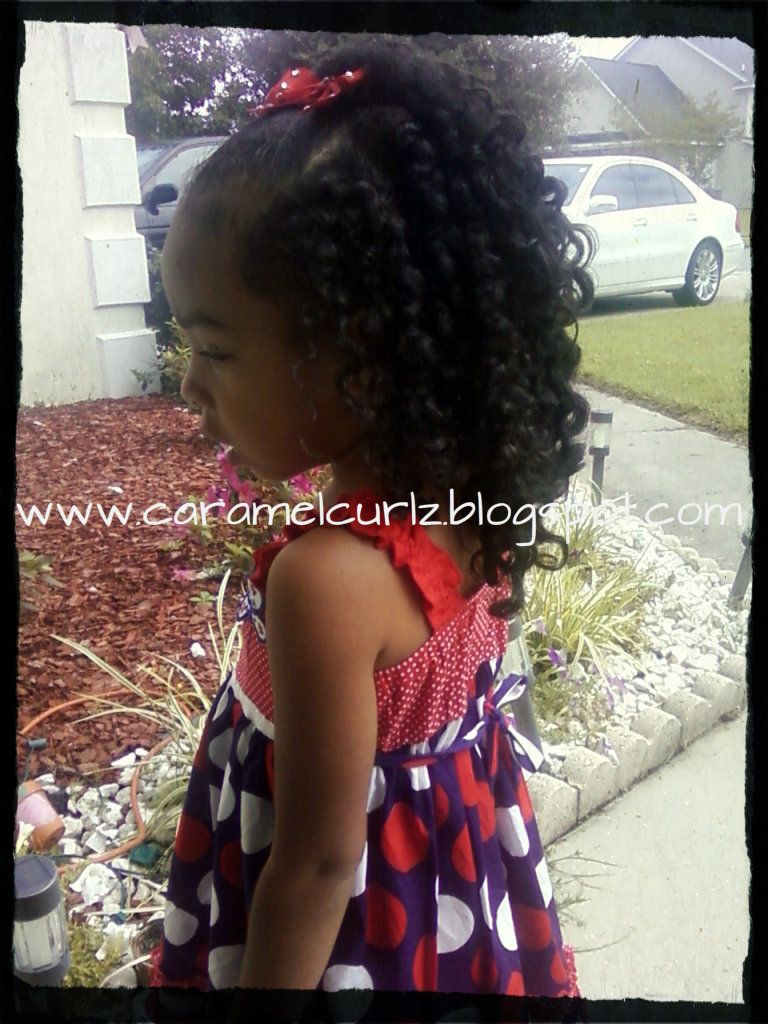
I will repeat this again: protective styles are curly hair's best friend!! Protective styles keep your ends from drying.  One of the problems we encounter are dry ends from car seats. I believe the best solution for this is to use a satin cap while the child is in the car seat.  You can quickly take it off when you are ready to get him/her out.  Another great idea is to make a tiny pillow with satin case to have in your car.  I actually made one myself that I keep in the car, but satin cap works best.    Use the satin cap for bedtime as well. Cotton pillow cases can create a frizz and dry their out hair as well.

So always remember the following:

* Healthy hair care routine;
*Moisturize as needed;
*Use the right tools;
*Don't over brush the hair;
*Really consider the hairstyle before doing it. 
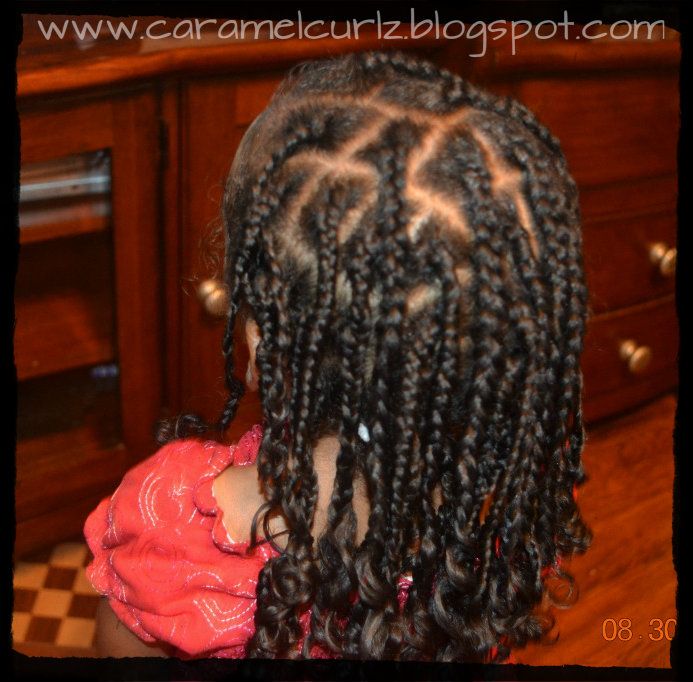
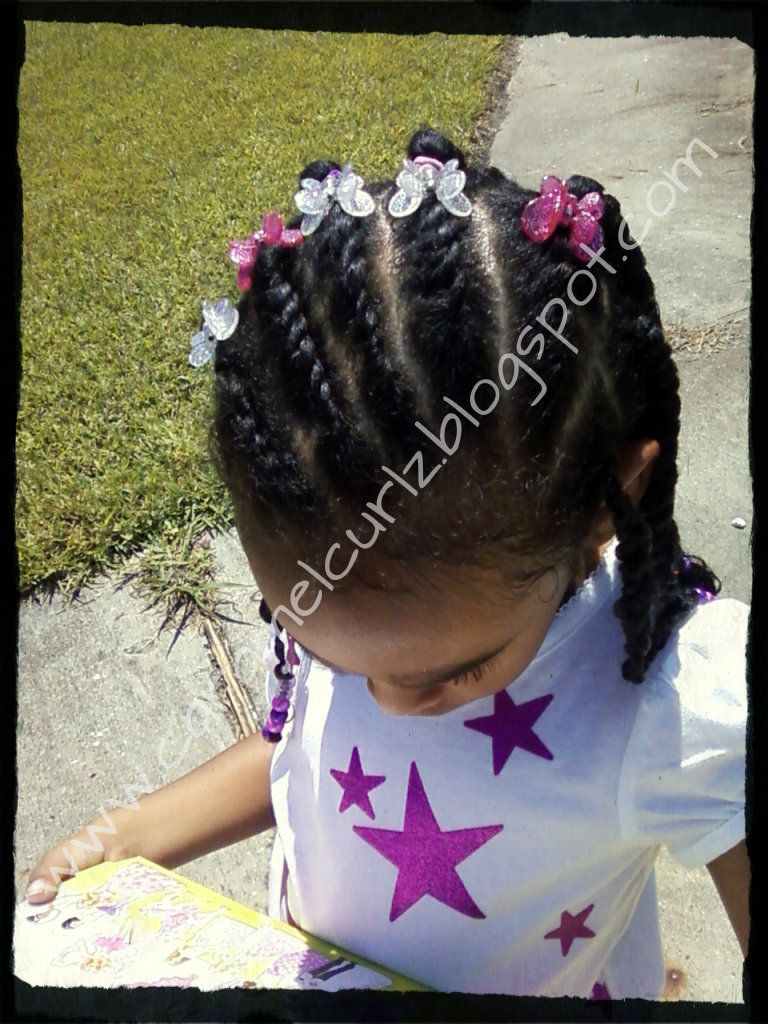
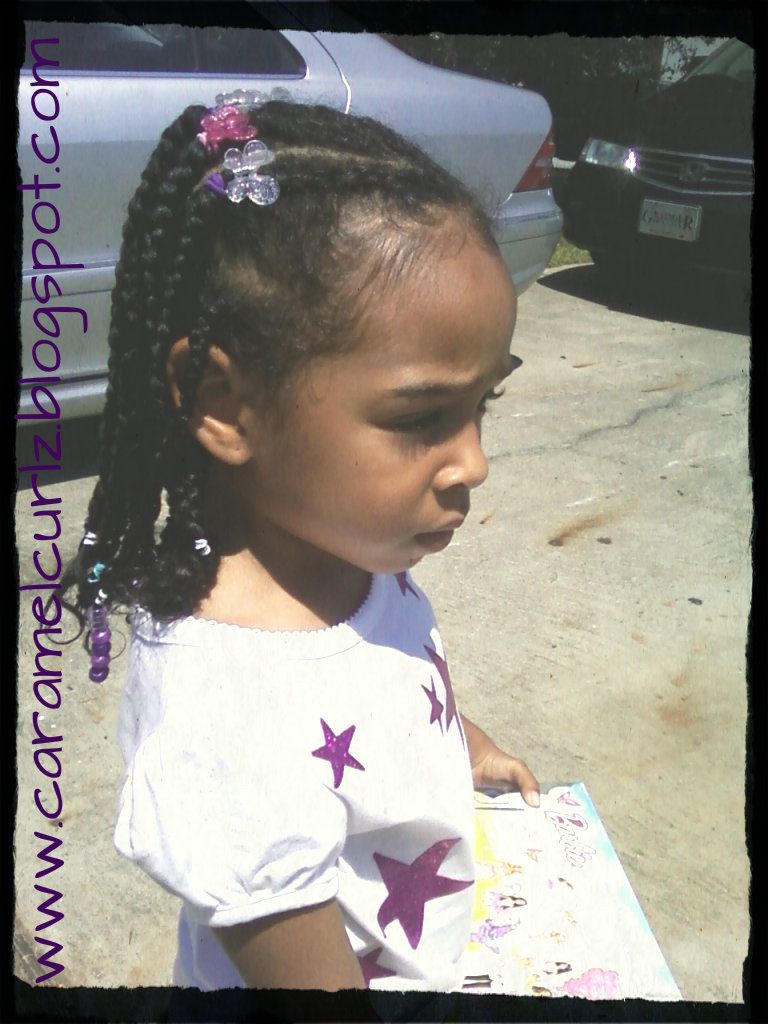
*Braids are a good protective style as long as you don’t do them too tight!

I hope this helps and do know that you are not alone in your journey. Finding what works for your child's hair can be overwhelming.  Comments, questions and suggestions are welcome.


Thursday, August 30, 2012

FUN STYLE!

BOX BRAIDS & ROPE TWISTS


This is a fun style for the summer and its perfect for school.  Box braids are very popular this summer and they are also a low maintenance natural style that can last for two or three weeks if not more.

I did not add any extensions or yarn to Ms. Bree's hair.  You can change this style in so many ways, I chose to do two strands rope twists on the top section, but if you do not want to do rope twists, you can do more box braids or you can also do cornrows. 

Box braids can be done in any size and they are very easy to do.  This week week I chose to do small/medium box braids.  I think the smaller the braids, the longer they last.  You can also accessorize them by adding beads or snaps at the end or you can keep it simple and don't accessorize them at all. 

You can also do other styles like wear them all down or place all braids into a pony tail or a nice fancy updo.

I do want you to know that doing box braids can be very time consuming, of  course it all depends on the size of the braids and the length of the hair.  I believe it is a perfect protective style, so I really do not mind spending one to two hours doing them.   Keep in mind that you can always part the section the night before and do the braids the following day in order to reduce the braiding time.  

It took me around ninety minutes to complete this style. 


Monday, August 27, 2012

LET IT LOOSE!


LOVE FREE HAIR!!!

This week was definitely busy but it was also very fun.  

Grandparents were visiting and while the boys took a deep see fishing trip, the girls got all dressed up and decided to take a stroll through the downtown area.  Since the kids started school Monday, it was our last opportunity to do fun things with the grandparents.  VACATION is definitely over!

Ms. Bree loves her hair loose and free so i decided to do just that.  The weather was wonderful so I thought, Why not?  

We accomplished this look by using Kinky Curly Curling Custard while her hair was wet and by braiding it.  (To get this look please see my Step by Step instructions Tab.  It is very easy to do!!

We got a lot of compliment and she looked beautiful rocking her curls!

Let's Get Organized!!

If you are a hair accessory lover like I am, then most likely you are going crazy with all the accessories.  

The accessories were taking over my bedroom and bathroom until my friend had a great idea, she purchased a craft organizer box from Michaels for a very reasonable price.  What I love about the organizer box is that you can make the compartments bigger for those bands or bows/barrettes that are in the bigger side, it's completely clear so you are able to see the contents without having the need to open, and it snaps close easily.

But the more fun I was having with her hair the more accessories I found myself buying, eventually my organizer box was not big enough to hold all the accessories.

Here is where my husband came to my rescue. He had a Stereilite 6 Drawer Cart (with wheels) that he kept in our room for his personal use.  After seeing me struggle with all Ms. Bree's hair accessories, he gave me the cart and said that I could organize the accessories better by using the drawers for different items.

I immediately made this a "family project", my son an daughter got into the idea of organizing all the items by color and sizes and we had  lot of fun in the process.  For me it is always important to share various activities with my children and during this project we also talked about sizes, shapes and colors.

I really love the cart, specially the clear drawers, i can easily see the contents of them.  I also like the fact that it has wheels which allows me to roll the cart to wherever I need it to be.

There are so many different ways that you can organize your hair accessories, here are a few ideas:

* Craft organizer box: which can be found at any crafting store, (i.e. Michaels, Walmart, Target)


* Stackable Cabinet:  These come in different sizes with clear drawers.


* Ice Tray Cubes:  These are really good for small barrettes, bows and bands.

* 2 Tray Classic Tackle Box:  Some stores like Walmart actually have a Disney Princess Tackle Box and it is also very convenient for traveling.

* Hair Accessories Storage Board:  If you are a crafty mommy you can probably make your own at home with things that you probably already have.


Monday, August 20, 2012

Style Update


Now for a quick update on Ms. Bree's hairstyle from last week.   
Like we've mentioned, this style is very simple and easy to do.  For us, this hairstyle only lasted a week.  However, if properly maintained, this hairstyle could last up to 2 weeks.

Daily maintenance:

*Every night, before Ms. Bree retired to bed, I sprayed her braids and ends with a bit of water and applied Shea butter Leave in conditioner. Then I placed a Child's Satin Sleep Cap on her head.

*Each morning, before Ms. Bree went to school: 

1.  I removed each pony tail and sprayed the roots with a bit of water.

2. After slightly wetting the hair  (from the roots to the beginning of the braids), I used a dab of Cantu Shea Butter and Coconut Oil (I rubbed this mixture in my hands, to ensure it was mixed well).

3. I then applied the thoroughly combined butter/oil to the root and worked my way up the beginning of the braids. 
  
4. After I applied the thoroughly combined butter/oil, I then combed the hair from the root to the beginning of the braids.  (I did this to ensure the hair was smooth and neat).

5. Lastly, I retouched the ends of each braid with Kinky Curly Curling Custard to ensure that the ends maintained that fresh, neatly styled look.    

Our next look will be Box Braids with beads on each end.  This will be a never before attempted hairstyle for me and a brand new look for Ms Bree!


Tuesday, August 14, 2012

Simple is also beautiful...Our 1st Tutorial

OUR STYLE FOR THIS WEEK!


We decided to do a very simple style for this week, as you can see is a very simple style that any busy mommy can do, it took me approximately 1 hour to 1.15 hrs to do it, but it will probably take less if you don't have to wash and conditioned the hair.  

We originally wanted to add beads at the end of each braid but my "beader" (bead applicator) broke after the first set of beads were applied to her hair so we had to improvise and do finger coils (finger curls) instead, but the result was beautiful.

We are aiming for this style to last for almost two weeks.  Mainly because we are planning to do box braids and beads for grandmother who will be visiting for a week, and every time Grandmother and Papa visit Ms. Bree does NOT like to get her hair done because it takes time away from Grandmother and Papa.

*********************************************************************************

In order to protect Ms. Bree's hairstyles through the night, we use Children's Satin Sleep Cap, which can be found in any hair store for a very reasonable price.  


To keep up with the style daily I would suggest  Kinky Curly Custard to tame the edges and spray any daily spritz you use, I personally use Shea Butter conditioner on the braids and the ends.

INSTRUCTIONS: 

We started by washing her hair with Beautiful Textures Tangle Taming Moisturizing Shampoo, and what I love about this shampoo is that is creamy and I certainly don't have to use a lot of it or keep repeating the process.  I can immediately feel that is cleaning her hair, and the creaminess makes it easier for my fingers to run through her hair and massaging her scalp.

Once I rinsed the shampoo completely out of her hair, I used Herbal Essence "None of your Frizzness", I saturated her hair with the conditioner, parted in half and began detangling that section by using the detangler comb.  Once that section was completely detangled, I made 2 jumbo twist and moved to the other section where I repeated the same detangling process.  I let it sit there for a few minutes then I lightly rinsed it out.

STYLING PROCESS:
Undo the 4 jumbo twists;

I used a combination of Cantu Shea Butter Leave I Conditioner and Coconut Oil mixed 
together and applied it to her soaking wet hair,  

Using a Rat Tail Comb I created a section in the center that began from her forehead to the back of her neck, and added a bit of Kinky Curly Knot today and removed any tangles, then once it was detangled I rubbed a little bit of the Kinky Curly Custard on the palms of my hand and began to cornrow the section;

Then do one big pony tail on each side, I did and used the same products to detangled each section then placed the hair on a pony tail by using Ouchless Scrunchies/Bands.

Each pony tail has 8 small braids (but you can do them as small or as big as you'll like)  I used small rubber bands to hold the ends since I really don't like Ms. Bree to go to bed with accessories. 

Products we used: 
Beautiful Textures Tangle Taming Moisturizing Shampoo; 
Herbal Essence "None of your Frizzness" Conditioner; 
Cantu Shea Butter mixed with a splash of Coconut Oil
Kinky Curly Knot Today; 
Kinky Curly Custard.

Tools & Accessories we used:  
*Combs:   Rat Tail Comb (Metal tail); Tangle Comb 
* Hair clips to separate the hair:  Metal Hair Clips/ Double Prongs Alligator.
*3 Ouchless Bands (one for each pony tail)
*19 to 20 Small rubber bands (you can add beads at the end creating another protective style)


Monday, August 13, 2012

Oprah's Natural Hair


"Although, never one to shy away from a style update, Winfrey is a firm believer that changing your hairstyle can change what we see and feel is possible. "I even notice a change in my dogs when they get their summer cuts: they’re friskier and livelier, feeling more themselves once the weight of the hair is released." 

Read more: http://www.oprah.com/style/Oprahs-Natural-Hair-on-O-Magazine-September-2012--Oprahs-Real-Hair#ixzz23SI2qRzs


I always believed that a total make over can chase the "blues" away.  For me its a way to feel different & more powerful, it felt more like I was leaving the past behind and a "new me was born".  I don't know why, but every time I was going to a rough patch in my life I would plan a half a day to a full day of pampering which included a trip to the hair salon and get a new hair cut or color, sometimes I would do both.  I have gone from brunette to blond, I have gone short hair to long hair; and let's not forget a trip to Nail Salon.


Thursday, August 9, 2012

Their First Haircut


Boys and their first haircuts are one of so many things we as parents look forward to, after all it is considered all over the world as a "milestone" for a baby, and so may of us even save the first lock of hair, we simply follow our family's tradition.  
My husband and I agree that our son was going to get his first haircut after he turned one.
 
When it was time for our son to get a haircut, we had several discussions as to where to take him and who was going to be in charge and/or responsible of any future trips to the barber.  My husband and I agreed that it was going to be a "daddy & son" thing to do every other week since we had already established that my son's hair grew at an alarming rate and it was also going to be an "Father & Son" bonding time.   


On May 2008, at almost 18 months old, my husband took our son to get his first haircut, well, I should say when he said good bye to his beautiful hair!  


When my husband and son arrived home that afternoon, I was really excited to see his new look, but what I got was something else.  I experienced a wave of emotions, I cannot explain to you how I felt, I was furious/angry, sad, and I believe what my husband experienced was "FEAR".   Honestly, at that moment, he was right to be afraid, I wanted to kill somebody, and I just didn’t know who I was going to kill first, him for allowing it or the barber for doing it right and/or expressing to my husband the fact that he didn’t know anything about biracial hair.


After that horrible mistake, we had to deal with the consequences.  His hair grew back rather quickly, within a month his curls were back but they were no longer soft and shiny.  In fact, his hair texture changed, it is now thicker and dry, his type 2C wavy hair pattern changed more to a 3A curly hair. 

Now, we keep his hair short on the sides and the back and a bit long on the top, we have finally found products that work for him in order to bring back the softness and shine.  He also gets monthly deep conditioning treatments to restore and protect his hair from his exposure to the elements.  


Wednesday, August 8, 2012

Ms. Bree ..when I couldn't do much...


This is Ms. Bree, she was born 5lbs, my little bundle of joy was born with a head full of hair, as all of you can see, she had very straight hair.

No biggie right! well, let me tell you we were so wrong about this...

When she was about 5 months old, she started to lose the hair on the back of her head, developing a "bald spot".   At the beginning I thought I was doing something wrong but let me say that there is absolutely nothing you can do to prevent them, some children do get the bald spots!


In the above picture, you can see Ms. Bree at 6 months old, the front of her hair was getting curlier and curlier while the hair on the back was missing in action.   


Here she is at 12 months old, as you can clearly see she found the toilet tissue very interesting! 
Her hair was getting thicker and curlier by the minute, you can also see that her sides were still short while the hair on top was growing longer very fast.  Sure the hair on the back of her head was growing but it was growing at a much slower pace than the top, the texture was also different than the hair on the top of her head, it was dryer, and sometimes would get tangle in her or my clothing, buttons etc.


In order to protect her hair from the elements, we would use hats (for bigger toddlers) to cover her hair entirely.  


Here she is at almost 11 months old, this is the best hair style that i could do on her short hair.  The sides and the back were very short at that time, you can see it better on the picture below.   


I know that it is very scary when your infant starts to lose his/her hair, it is totally normal unless you see pattern through out their head, red/white flakes and/or when the infant is constantly trying to scratch that particular spot, and/or if the child is no longer an infant and suddenly finds a spot.  A parent usually knows when things are not normal.    

If you notice your infant having a bald spot just watch the way he/she sleeps.  Ms. Bree used to sleep on her back while at daycare, but on her tummy while at home, so her bald spot never got bigger. 

I found this article about Baby Hair Care:


Unfortunately, I didn't do anything to her hair back then, and as of this date I still wonder if I could have done something different to help her hair.  My daughter's hair is a combination, with really tight curls on the bottom and the loser curls on top, it is also known as 3b/3c Type of Hair.