
I thought about covering all three styles in one post but you'll probably get tired of reading.
I will also be posting the steps by steps instructions soon, so make sure you visit our "Step by Step Instruction Page".
The Bun!
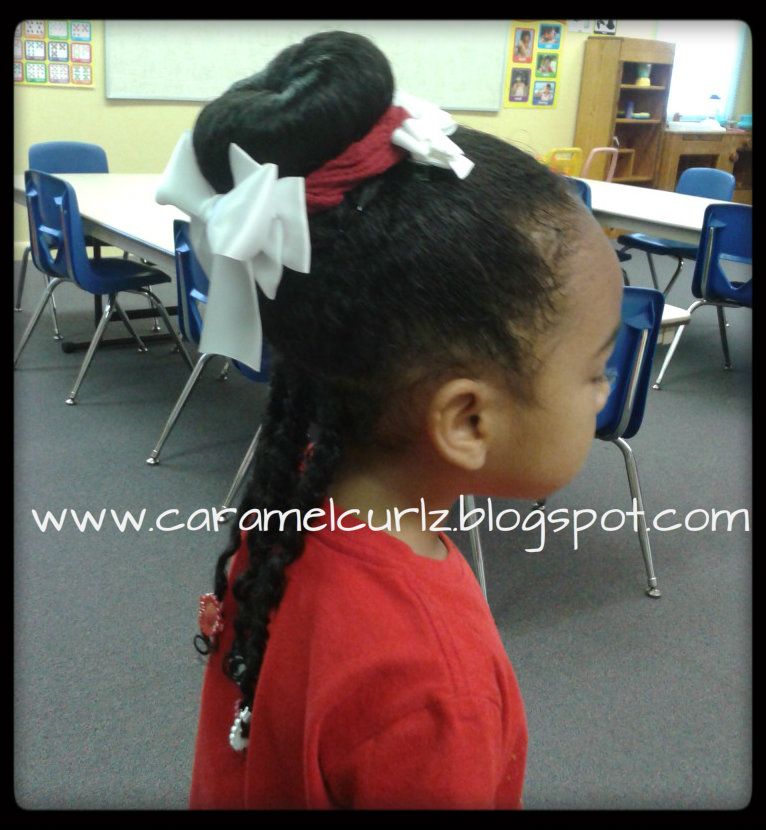
This is Ms. Bree's hairstyle from last Friday!
I have to admit that I am very proud of myself for doing this style in less than forty five minutes and right before heading to school! That is a big + in my book.
This style is a very simple style to accomplish as long as you have the following tools:
1. A foam in the shape of a "doughnut" or you can use a sock; I found this at the local hair store for $0.99!
NOTE: IF you decide to use a sock, I would recommend using a soft fabric sock and try for a very similar color of your hair.

2. Bobby Pins;
3. 2 bands (not rubber bands), but the cloth covered bands.
1. I made sure her hair was detangled;
2. Using a rat tail comb I parted her hair from ear to ear; (you can choose the amount of hair you want to use to do the bun)
3. I collected all the hair from the top section and secured it into a pony tail by using Goody's cloth covered band;
4. Once the hair was completely secured into the pony tail, I put the hair (from the pony tail) through the foam doughnut.
5. With the help of a comb, smooth the hair over the foam doughnut, try to cover the doughnut as much as possible.
6. Once you have smoothed the hair down, hold it and apply another band over it. You will now have all the ends out.
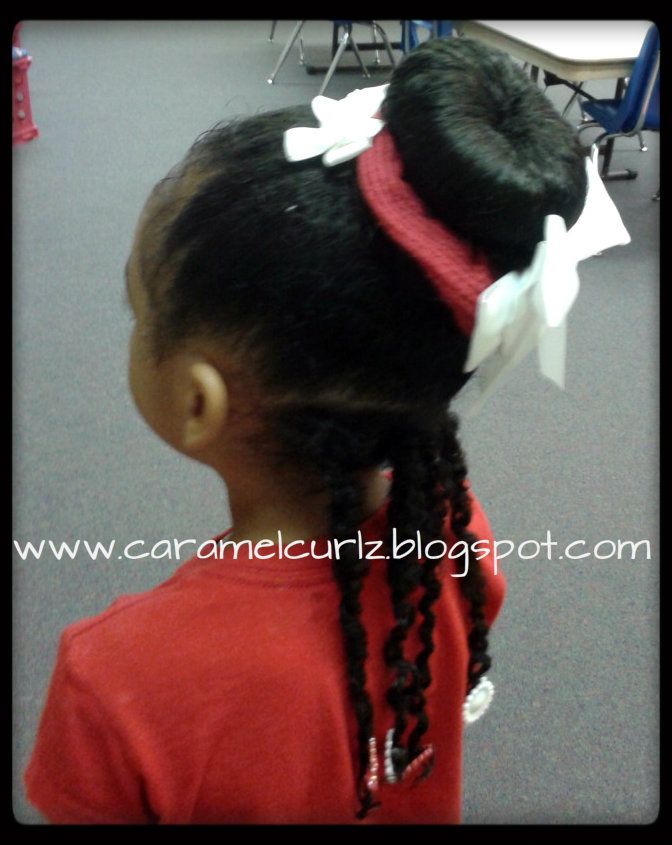
7. Try to tuck the ends under the bun as much as possible. Since Ms. Bree's hair is long I gather all the lose hair and carefully brought the hair to the back of the bun, then divided the hair in half, twisted the left side and brought under to the right side of the Bun, then I twisted the right half and brought it under to the left side of the bun.
I used about 4 bobby pins to secure the hair in place.
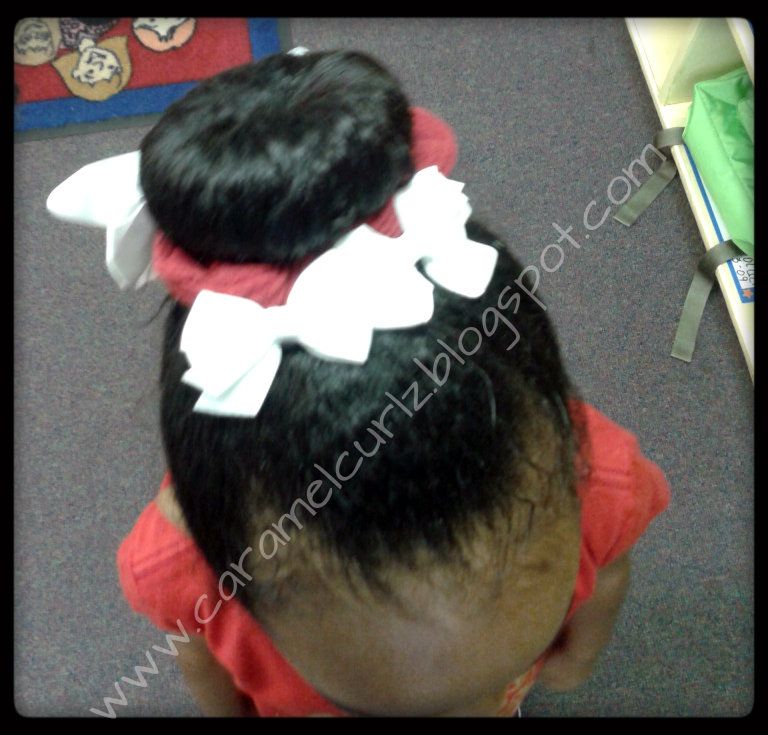
8. Then I used a "scrunchy" matching her outfit and placed it over the Bun.
AND YOU ARE DONE WITH THE BUN!
We used a big white bow, and a small size Hair Bow Clips to accessorize the bun.
9. On the bottom section I created four small 2 strand twists.
No comments:
Post a Comment